Saturday, August 4, 2012

Pull up a chair...


Lately I have been on a quest for a new kitchen table and chairs. I wanted to get something old and revamp it. I saw this chair at our local thrift store for $10 and luckily it already came with a cushion. Score! 

Remaking it was was suprisingly easy. I cleaned the chair with water and paper towels. To make the paint stick to the glossy finish of the chair I used liquid sandpaper. After waiting about 30 minutes for the liquid sandpaper to set, I painted it aqua with a quart of house paint I got at Home Depot in the oops paint section. I saw the aqua color and knew I would need it for something one day. My next step was antiquing the chair with Howard's Premium Paste wax in Walnut that can be purchased at Ace Hardware. You just brush it on and wipe off the excess till you are satisfied with amount of antiquing. Finally I spayed it with Rust-oleum Crystal Clear Enamel to give it a glossy look.

To remake the cushion, I took the fabric off of the original cushion and re-used the foam insert. I aligned my chevron pattern and used a staple gun to secure it to the wooden base. I sprayed the cushion with Scotch Guard to *hopefully* prevent it from getting dirty from little fingers. This particular chair had screws that went up from the bottom of the chair, into the cushion base to keep it attached. I am thrilled with how it turned out and plan to make a matching chair to this one and another set of a completely different shape.


Tuesday, April 24, 2012

April Rush


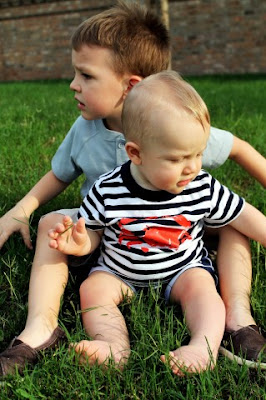
Since I have been crazy busy with work, book club, the boys and Insanity, I haven't really had a chance to post. Here are some of my favorite pictures from the past month.


8 Months and not happy


Impromptu photo shoot at the park


The best of Easter Sunday


My always happy boy

Tuesday, November 8, 2011

Fabric Memory Game


In September I had a little girl's birthday party to attend and really wanted to try making this fabric memory matching game on pinterest. It turns out it was so easy and turned out adorable. I made a 20 piece memory game. What I did was this:


  • Cut out 40 2 inch squares of cream felt. One for the back and one for the front. I learned that you need a thicker piece of felt because otherwise it will be see-through.


  • In the front pieces of the felt I cut out a 1.25 inch square in the middle using an exacto knife.


  • Cut 20 pieces of 1.5 fabric ( I used quilters squares because they already came in a coordinating pack) - 2 of each pattern


  • Put the back felt, patterned fabric, and front felt (with window in the middle) together.


  • Sew them up on the inside of the window and outer edges.


So much more fun than a memory card game and would look great displayed on a shelf.


Elf on a Shelf

Two elves came in the mail to visit us from the north pole today, Monty and Jingle. We opened them outside and after a bit of confusion Luke was excited. Our first order of business is to make them a bed to sleep in.


Thursday, November 3, 2011

Pierce's portrait

After having people over on Halloween and looking at our house with a critical eye, I realized that we don't have many pictures of Pierce around. Granted he's just a little guy and hasn't had time for too many photo opts but I decided he needed to make an imprint on our home decor.

On a side note, when Luke was about 18 months old I made a graphic inspired painting of him for David's office. When I visited his office the other day and saw the painting I realized he needed one of Pierce too. David fell in love with the picture of Pierce in the Spartan football crocheted hat so I knew that was the one. I altered my original photo in Photoshop, printed it out, traced it to save time (shhh don't tell my students) and then painted it in.

Here is the original photo:


And my painted one:


Since I had the left over printout that showed me what colors I used (and since I have been on such a photo transfer kick lately) I decided to make one for the house. I put green underneath as it was just a color I happened to have. The bottom picture of the transfer was much more distressed. Probably because I wasn't patient enough to really let it dry. I painted over the face with some watered down paint to help it stand out a little. Happy accidents as they say. I love the finished product!

Sunday, October 30, 2011

Putting Pinterest to Practice


For this project I decided to merge two pins on pinterest. One being the photo transfer on 11x14 canvas with vinyl letter stickers and antiqued stain. The other being this sweet photograph with caption. I used a picture of Luke and his first time at the beach playing in the sand.