Tuesday, November 8, 2011

Fabric Memory Game


In September I had a little girl's birthday party to attend and really wanted to try making this fabric memory matching game on pinterest. It turns out it was so easy and turned out adorable. I made a 20 piece memory game. What I did was this:


  • Cut out 40 2 inch squares of cream felt. One for the back and one for the front. I learned that you need a thicker piece of felt because otherwise it will be see-through.


  • In the front pieces of the felt I cut out a 1.25 inch square in the middle using an exacto knife.


  • Cut 20 pieces of 1.5 fabric ( I used quilters squares because they already came in a coordinating pack) - 2 of each pattern


  • Put the back felt, patterned fabric, and front felt (with window in the middle) together.


  • Sew them up on the inside of the window and outer edges.


So much more fun than a memory card game and would look great displayed on a shelf.


Elf on a Shelf

Two elves came in the mail to visit us from the north pole today, Monty and Jingle. We opened them outside and after a bit of confusion Luke was excited. Our first order of business is to make them a bed to sleep in.


Thursday, November 3, 2011

Pierce's portrait

After having people over on Halloween and looking at our house with a critical eye, I realized that we don't have many pictures of Pierce around. Granted he's just a little guy and hasn't had time for too many photo opts but I decided he needed to make an imprint on our home decor.

On a side note, when Luke was about 18 months old I made a graphic inspired painting of him for David's office. When I visited his office the other day and saw the painting I realized he needed one of Pierce too. David fell in love with the picture of Pierce in the Spartan football crocheted hat so I knew that was the one. I altered my original photo in Photoshop, printed it out, traced it to save time (shhh don't tell my students) and then painted it in.

Here is the original photo:


And my painted one:


Since I had the left over printout that showed me what colors I used (and since I have been on such a photo transfer kick lately) I decided to make one for the house. I put green underneath as it was just a color I happened to have. The bottom picture of the transfer was much more distressed. Probably because I wasn't patient enough to really let it dry. I painted over the face with some watered down paint to help it stand out a little. Happy accidents as they say. I love the finished product!

Sunday, October 30, 2011

Putting Pinterest to Practice


For this project I decided to merge two pins on pinterest. One being the photo transfer on 11x14 canvas with vinyl letter stickers and antiqued stain. The other being this sweet photograph with caption. I used a picture of Luke and his first time at the beach playing in the sand.

Tuesday, October 25, 2011

Vintage Style Photo Transfers

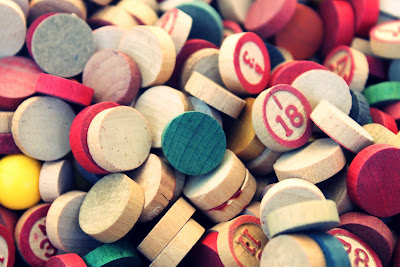
At the Round Top antique show last month I came upon a vendor that had tents and tents of antique toys and games. Since I dont really have a use for buckets of this stuff and also because its not cheap, I decided to use my camera to capture the images and use them as image transfers on canvases for the play room. So here are the five pictures I decided to use. The dice photo is my favorite.


Once I painted canvases and transferred the photos, this is what they looked like


Monday, October 24, 2011


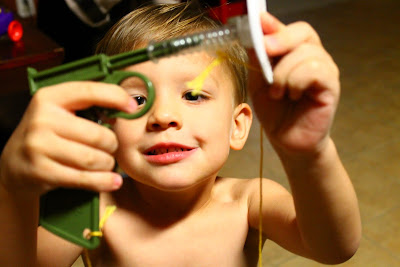
Here is Luke and his first hunting weapon my Dad was so proud to purchase. What you are looking at is a gun that shoots this fan on a string and kills insects (mosquitoes, flies, spiders). Savage. I pretend like its dumb but secretly I might just have to use this.
Putting Pinterest to Practice...

What good is Pinterest if you don't put those ideas to use, right? This weekend I decided to put some of my pins to the test.

Link
First, I decided to make my friend Whitney a jar for her kitchen originally found here

Materials:

  • Glass jar
  • Chalkboard spray paint
  • Plastic animal hot glued to lid
  • Red spray paint

To make this was easy. I hot glued a plastic animal to the top of a glass jar. I spray painted the lid and the animal shiny red and also spray painted the sides of the jars with chalkboard paint so that she could change the label to reflect what treasures she has inside. So easy!


I was pretty pleased with how it turned out.

For my next project, I decided to master the ever illusive photo transfer as seen here. I tried it on a mat board but plan to make a couple out of canvas since it turned out so well. I used a picture of Luke from last Halloween that I happened to have on my computer at school.

Materials:

  • mat board
  • 5x7 laser print out
  • gel medium
  • spray bottle filled with water


To do this you have to print your photo on a laser printer, a xerox printer will not work. After you print out your photo, cover your canvas (or mat board) with a thick coat of the gel medium. Once you have coated it, you will put the image face down onto the canvas. Smooth out the picture so it adheres well. After you have waited about 4 hours, get your spray bottle and spray the back of the picture with water. Let it soak in. When the picture is thoroughly wet, use your finger to rub off the back of the paper. Do so gently and it will leave the transferred image behind. It will start to rub the image off if you press too hard or do too much. A little bit of removed image helps give it a distressed look. You might have to re-wet the image to get all of the paper off. Once you are finished, give it one final coat of the gel medium to bond it to the canvas. Voila! Now you have a beautiful transferred image.


I can't wait to make some transferred images canvases for Pierce's new room.


Saturday, October 15, 2011

Saturday, October 1, 2011

Wondering what I found at Round Top, the greatest antique fair in the world? I thought you were. Well without further suspense...here it is!


1. A transformer car LUKE CAN DO BY HIMSELF! Yes! And an amazing Optimus Prime helmet with a voice activator so that you too can be a transformer.


2. A pirate speedo for Luke because they just really are so adorable on little boys (Don't worry, I wont put him in them over the age of 5). 3. Baby legs that actually look like they are for boys, my life is complete. 4. Shorts I may or may not be able to fit into someday.


5. A tiny metal stamp holder shaped like a mailbox. 6. Pierce spelled in childrens' blocks. 7. A bingo card. 8. B is for Bear, Pierce Bear, from a vintage letterman's jacket.


9. Vintage comic book postcards. 10. A P from an old sign. 11. A metal flip scoreboard with the numbers 0-4. Great for pictures to show boys age??


12. Vintage license plates from Texas, Michigan, and Louisiana just because the colors are great.

As you can tell, I am working on decorating Pierce's room in a more vintage look. Cant wait till Round Top comes around again in March.


Tuesday, August 2, 2011

Sunday, May 29, 2011


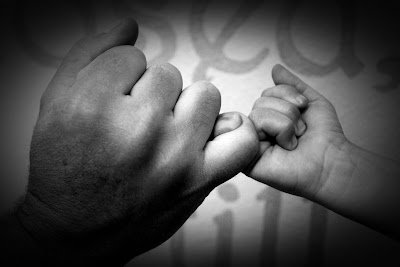
Just a few photos from my day. Is there anything sweeter than little boys and their dads?

Monday, May 16, 2011

5 photos a day

Here I am with a new camera and a grossly neglected blog. So now it is time to try to catch up.


I figured that trying to take 5 quality pictures a day would be a good start, hopefully not impossible.


This is by far my favorite picture of the day. Flowers really do make the best subjects. They are just so naturally beautiful, you dont have to do much. I love how this one looks like a painting. New project idea perhaps??


I spent the evening at scrapbook club. A little bittersweet as it was the last one of the year. The little tiny bits of beauty are the thing that draws me to scrapbooking. Buttons, flowers, and little glass jars. If only I had a little girl's room to decorate...


With the arrival of my new baby Pierce speeding towards us, I am suddenly hit with a frantic thought that I haven't done anything to prepare.


When you are pregnant the first time around you take everything for granted. Coming home early to take an afternoon nap. Lounging around the house, snacking on baked cheetos and watching your favorite shows. Taking bubble baths and reading books. The second time those luxories are gone. Disney XD and Super Why rule the tv. Laundry threatens to overflow. And any time you try to close your eyes for just a teensy second you are hit with a Thor hammer and informed you are Dr. Doom.


Its not all bad though. The fast pace of parenthood makes you forget all about being pregnant. You don't have time to eat and the days and weeks you spent counting down before fly by until there is no time left.


While I was at scrapbook club I took the oportunity to roam around my friend Whitney's house to find inspiration for some pictures. I loved that she had this crossword puzzle on her fridge. Done in pen and white out. I just found it humorous. A reminder that sometimes we put ourselves up to challenges in life it just doesnt turn out the way we hoped but with a little redirection, it turns out good anyways.


My husband didnt like this picture. He said you couldn't tell what it is. I, however, think its quite obvious that it is ice cream. A afternoon snack for a little boy that was good at school.


Minus the glare on the card, this snapshot of our bulliten board makes me smile. I am told that Luke picked this card out for me for mothers day himself. A mama and baby donkey. True to life, it reminds me of the early morning hours when Luke climbs into our bed. Too tired to take him back to his room, I let him stay. He nestles his litte body right up against mine even though there are miles of room on our California King. And there we sleep until the sun shines in the window and its time to begin the day.


Sweet flowers from a sweet friend.